ID verification before viewing store
Require ID verification before customers can even view your store. Real ID has a flow just for you, no code required.
Real ID has a built in flow to require customers to sign in or register an account with your store, and verify their ID before they can view your store, open their cart or checkout.
Unregistered guest customers will be greeted with a page to explain that ID verification is required to proceed:
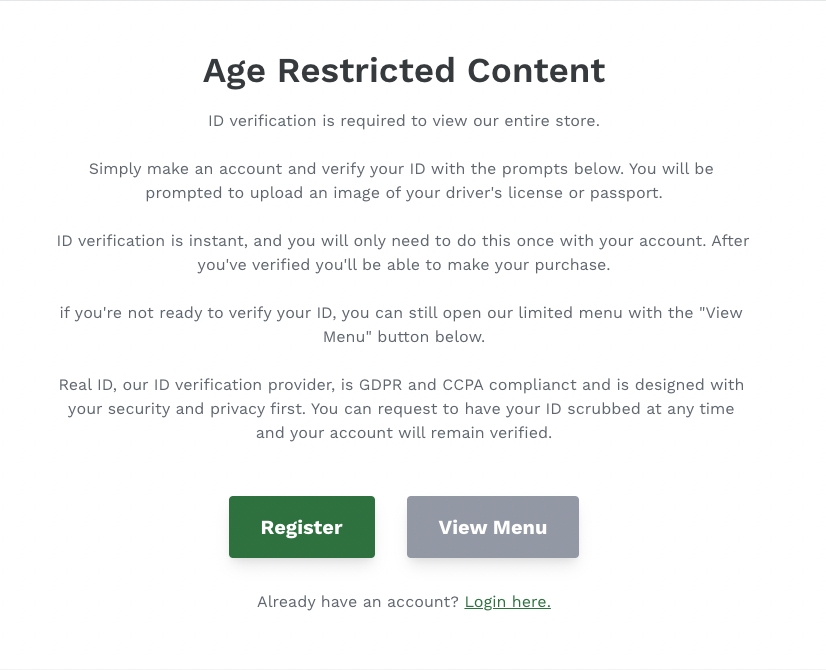
Then after they login, they'll be prompted to verify their ID.
How it works
This flow will require the customer to login or register an account and also verify their ID before they can continue to see the products on your store, or checkout an order.
Real ID will modify your storefront to add this functionality - no code required.
Here's what the customer journey from guest to verified customer looks like:
Setting it up
To enable this flow, first open the Automations section of the Settings within Real ID:
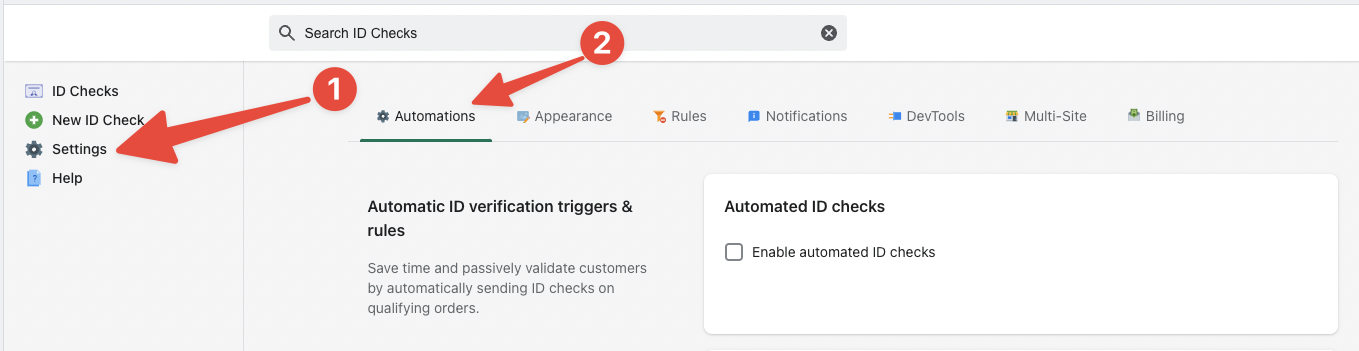
Then you can enable this flow by enabling Automatic Verification and then selecting Before viewing store:
Adding pages unverified customers are allowed to view
By default, Real ID will only allow your store's account registration and login pages to be viewed by unverified customers.
This is the required so they can sign up and verify their new account.
But you can add individual pages that unverified customers and guests alike can view without ID verification, such as your privacy policy page, or a page explaining this ID verification policy.
To add a new page that doesn't require ID verification, scroll down in the Automations section of the Settings page and add additional pages by their link.
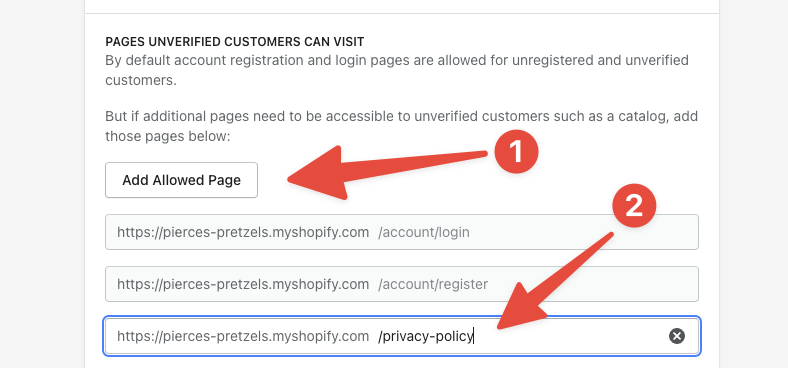
Don't forget to click Save when you're finished!
Changing the appearance and content
To change the theme and the content explaining the ID verification process and why it's required for your store, you can visit the Appearance section of the Settings.

Then click on the Registration tab to change the ID verification gate content:
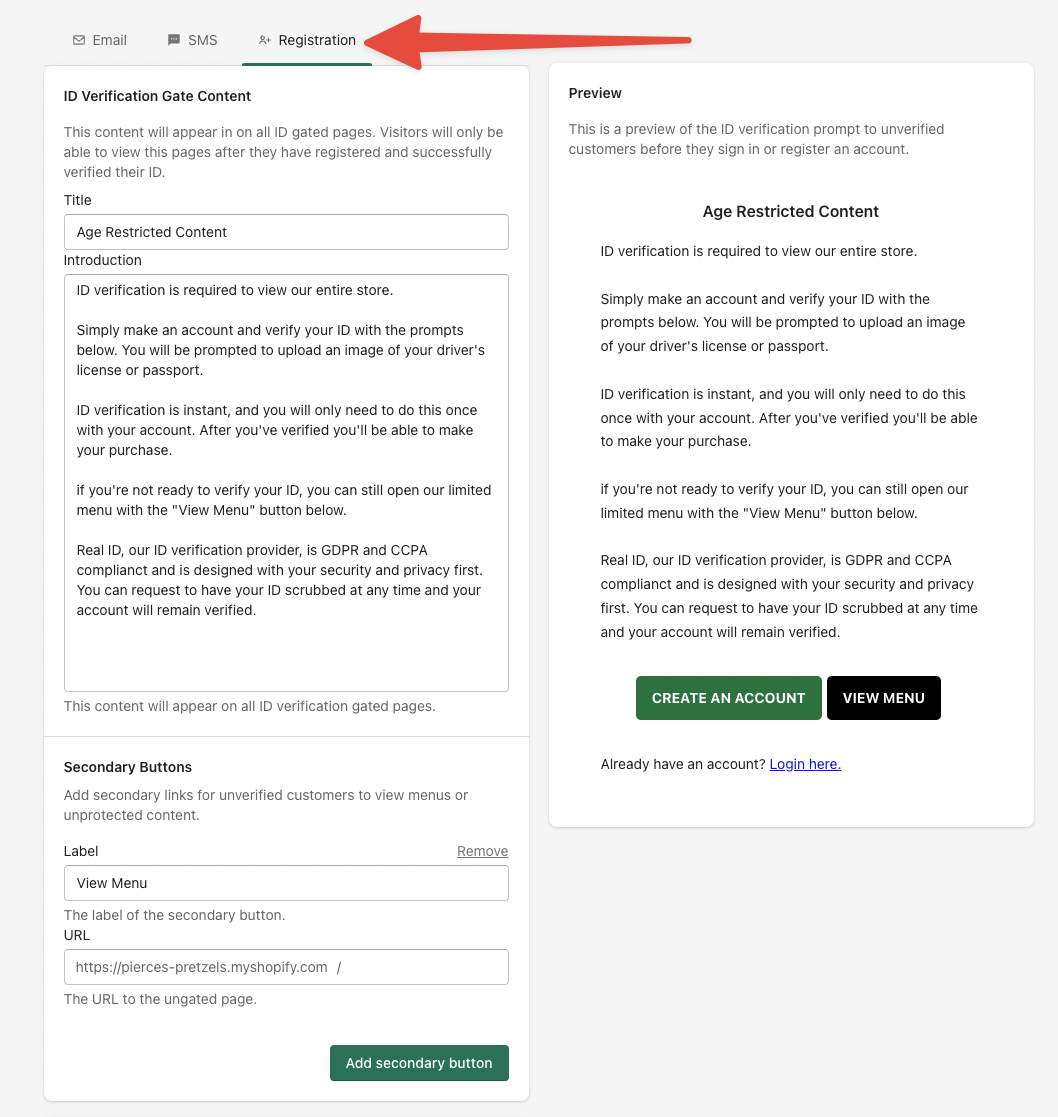
This content is shown to unregistered guests, so it should clearly communicate that the ID verification process is:
- Required for viewing your store
- Takes just few minutes to complete
- Only needs to be done once for their account
- It's secure
In addition to changing this content, you can also add additional buttons that link to pages on your store. These are helpful for making links to privacy policy pages, or pages that explain further why ID verification is required.
Make sure the links are allowed to be visited by guests, otherwise guests won't be able to open them.
Styling the start verification button
The button that starts verification is customizable without code through the Appearance section in the settings.
But if that doesn't meet your exact criteria, you can use CSS within your site's theme to modify additional properties such as the border, border radius, shadows and more.
The Real ID verification button has the class name .real-id-start-verification, which you can use to apply custom styling via CSS rules. Here is an example:
button.real-id-start-verification {
   border-radius: 5px; /* Adjust the value to control the amount of rounding */
}
Setting up on WooCommerce
Setting up an ID gate in WooCommerce requires a few more set up steps for the gate to function properly.
Allow users to register
Customers will need to be able to register accounts on your site in order to complete the ID verification process.
Follow these directions to allow customers to register their own accounts on your WooCommerce site:
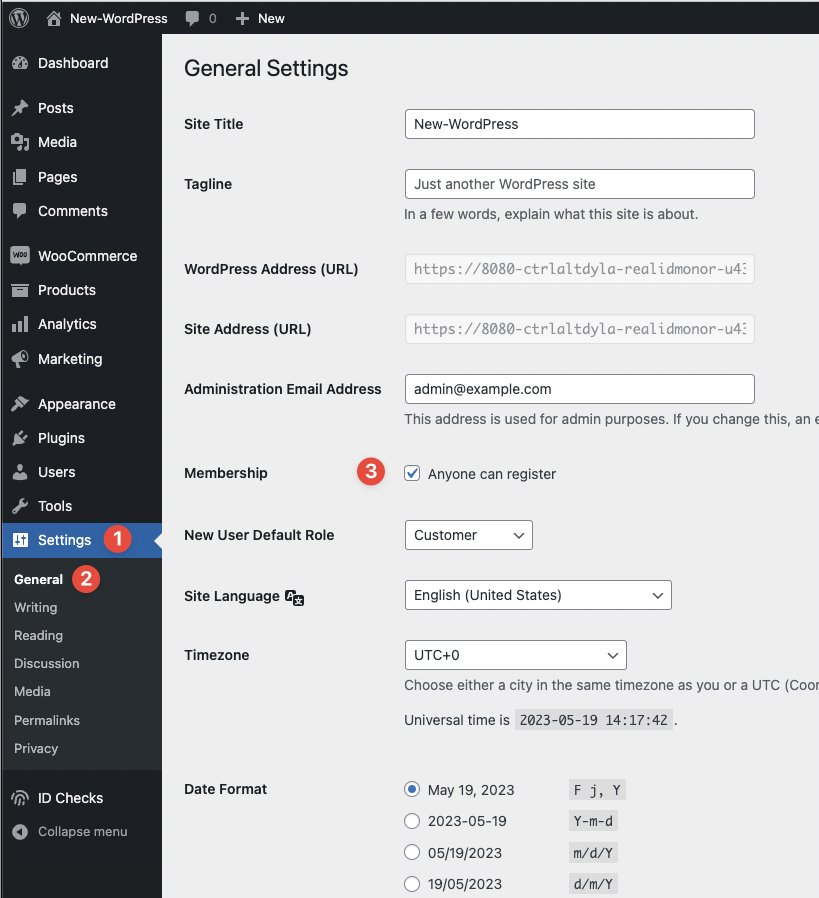
- Login to your WordPress admin
- Open Settings
- Open General
- Near the middle of the page, under the Membership option, check the Anyone can register option.
- Scroll to the bottom of the page and click Save Changes to apply the change
Allowing the customers to view the login page
By default, Real ID will allow unverified guests to vist the /my-account page on your site.
However, if you have a different page for registering, logging in and resetting a password, you'll have to add these pages as allowed pages.
For the best experience, we recommend using the Post name permalink structure for your WordPress site. The default allowed pages assume this peramlink structure.
Frequently Asked Questions
Do I need to make any modifications to my theme for this to work?
No, Real ID is compatible with most Shopify themes. There may be themes that might not be compatible out of the box, or apps that add frontend elements that need to be covered by the ID check gate.
If your theme isn't working as expected, please contact us for help.
Will customers only need to verify once?
Yes, customers will only need to verify their account once. Even if they switch devices or log off, they can log back into their account and it will stay verified.
What if a customer has an issue with completing their ID check?
If a customer is having difficulty completing their ID check, or they have failed it, you still have the ability to override their ID check.
Manually approving a customer's ID check will automatically verify their account and allow them to continue to browse your storefront.
After manually approving a customer, we suggest that they refresh their browser for the latest update.